Recording, Streaming, and Projecting Close-Up Magic
This masterclass provides a practical introduction to the audiovisual production of close-up magic. Borja Montón outlines three main needs: recording to review or share a performance, streaming a show online, and projecting the image onto a screen so a larger audience can follow the details. The content focuses on equipment and signal flow; it does not teach new sleights or card routines.
Recording with a Simple Setup
The starting point is a phone and a stable mount. A compact tripod is shown, comparing vertical, horizontal, and wider framing options that allow the performer to be seen along with the table. Attention is not limited to the hands alone: the performer's presentation and the information received by the viewer are equally important.
It explains why controlling focus and exposure is crucial to prevent automatic adjustments during a performance. The instructor demonstrates settings on his phone and mentions Blackmagic Camera as an example of an app with advanced controls. The exact way to access these settings depends on the device.
Lapel microphones and other voice-capture options are also discussed. The camcorder is presented as an alternative for recording to memory cards and keeping clips organized separately from phone storage.
Lighting and Framing
Borja turns the studio lights on and off to show how the image changes. He explains the function of a key light, a fill light, and a backlight to help separate the subject from the background. Shadows and the effect of adding lighting to the background or working surface are also examined.
The demonstration compares simple home lighting with multiple purposefully placed fixtures. The goal is to understand what each light contributes before adding more gear.
We also analyze the difference between performing live and being captured on camera. Framing and the ability to review a move force you to check which techniques and cover work best on camera. The use of alternative angles to build a clear audiovisual presentation is also discussed.
Streaming Online
The explanation covers a setup consisting of a continuously powered camera, microphone, video output, capture card, and computer. The role of the capture card is clarified in terms of feeding the camera signal into the computer running the stream.
OBS is introduced as a tool for receiving and managing video feeds. There is a live demonstration of an iPhone used as a source on the instructor's computer, alongside references to platforms like Zoom and YouTube. The importance of a stable network connection and planning for phone power and interruptions is highlighted.
This is an introduction to the workflow and software possibilities, not a complete setup guide for every platform, nor a guarantee that any given mobile device will perform identically.
Projecting Magic in a Venue or Theater
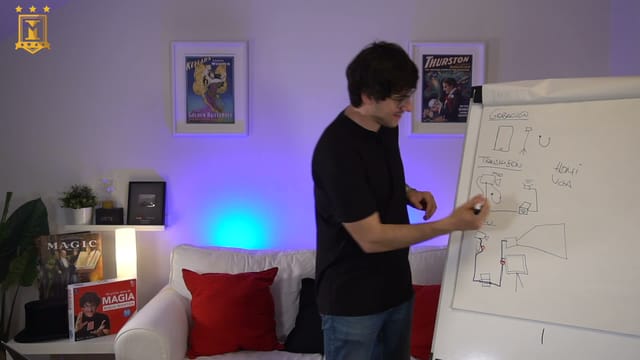
To ensure the audience can catch the fine details, the signal path from the camera to a television or projector is explored. The difference between sending the feed continuously versus routing it first through a computer or switcher—allowing you to control when it appears—is explained.
HDMI connections are shown, potential needs for adapters are discussed, and solutions for bridging the distance between the stage and the control booth are compared: network cable extenders, HDMI/SDI converters, and wireless transmitters. Capture quality, latency, power supply, and hardware compatibility are all key factors in this choice.
The ATEM Mini is presented as an example of a switcher for working with multiple cameras. A simpler setup using just a capture card is also described, without requiring all the gear shown.
Controlling What the Audience Sees
Using scenes in OBS, you can switch between the camera, a black screen, and an image like the show's logo. The role of a technician to handle these cues during the performance is discussed.
QLab is briefly introduced as another tool for triggering the camera feed and routing content to different screens. Its ability to coordinate music, lighting, and show cues is mentioned as an overview; this class does not cover full programming of those features.
Gear and Preparation
To start recording, you just need a phone or camera, a stable mount, and lighting that makes the performance clearly visible. Depending on your goals, you can add a microphone, computer, capture card, compatible cables or adapters, an internet connection, and a screen or projector.
Advanced card magic techniques and prior audiovisual production experience are not required. However, it is helpful to know the ports on your equipment and map out the signal path before setting up. The models, software, and prices mentioned reflect the setup used during recording: this masterclass helps you understand their functions without promising universal specifications or compatibility. Luis Olmedo's notes are recommended as external reference material and are not included as a downloadable asset.